(Thank you Mom & Dad for this awesome Christmas present!)
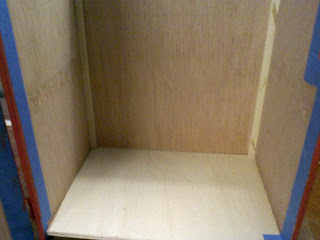
Here is the "naked" kit, a bit before I did much....
I removed the floor that separated the dollhouse. This made it easier to paint the inside as well. Here the house is taped off for the exterior painting.
Below you see the 1st floor mock-up with the wallpaper I made using a computer. The wallpaper was created by scanning a note card graphic and the "wainscoting" was added by creating boxes. I printed it out on cream paper using an old b&w printer cartridge.
I decided to raise the ceiling. "Why should the 2nd floor bedroom have more head room than the 1st floor parlour?" my 1/2 scale porcelain dolly asked. Good point dolly! I only raised it a half inch, but that's a whole foot in 1/2 scale land.
I "installed" stained crown moldings and stained both the floors. The parlour ceiling was painted gold, of course!
After raising the ceiling, I had to cut down the upstairs porch and its door so that they fit properly. I made the porch wall removable, so I could have full access to the bedroom. Ah, the perks of being your own contractor!!!
I wallpapered the whole kitten kaboodle. I even made wallpaper with "stairs". One has to get to the 2nd floor somehow!
Tip: use removeable double sided tape so you can change out your wallpaper. You can use the "old" wallpaper as your templates, and then stick it onto wax paper for storage to use another time! Man, who needs a real house anyway!
One of the nice things about old Bliss dollhouses and most dollhouses of that era (Turn Of the Century 1900), they had removeable roofs....
The outside graphics are all supplied in the kit. You cut them out and adhere them with Yes Glue. Then you brown shoe polish the whole outside as Jean suggests, buff it all up, and you get that awesome vintage look!
Here is the finished, decked out interior.
1st floor parlour....
+ 2nd floor bedroom....
= Happy Home!
Yep, perfect showplace for dolly's metal Tootsie Toy and Kilgore furniture (1920's). And she had a vintage fireplace shipped directly from England! Oh dolly!
It took me six weeks of self exploration and fun,
that I will recommend to anyone!
She started as a fairy,
but then turned into Mata Hari!
Ha! I made a rhyme!
Goodbye Mata! Enjoy your little home!
* Thanks to Jean Nordquist Designs for this awesome Doll's Dollhouse Kit No.2 and "blessing" for me to use my photos of my little Bliss-like house! http://jeannordquist.com


Wonderful! Now you can come out here and do our house, just scale it up a little bit....;-)
ReplyDeleteMy no. 3 kit arrived today! Just checking back to your blog for inspiration! You did a FANTASTIC job on this, it looks great.
DeleteI love what you have done with the Nordquist kit. I received the exact kit for my birthday. If you don't mind, I would like to use your idea abt raising the ceiling on the first floor and cutting down the balcony area so it will fit. How did you remove the ceiling to raise it? And how did you cut down the balcony area? I have made several kits but not ever done any changes so any help would be appreciated.
ReplyDeleteOh please, go ahead! It's been sooo long since I made those changes. I think I scored the floor sides and as you can see in the separation photo, there was some damage to the wall sides. But since I "wallpapered" it really didn't matter. The balcony, I took the length off the bottom of it and it's paper graphics. I think I drew the line and placed it on the edge of my work bench and cut it by had, flipping it to get the other side. Hope that makes sense! Good luck Kiddo!
DeleteThank you for replying. I think you said you cut the bottom edge off the balcony (with a saw?)? I hate to be so dumb but I'm not sure what "scoring" means. Did you make little cuts over and over with some kind of drimel tool until it came undone? Does water help soften the glue? I don't see any nails in the ceiling piece so I'm wondering if getting the glue wet would help.
DeleteThank you for helping me. It's very nice of you and I promise not to keep pestering you. I just admire what you have done to the various kits to change them into what you want. One more question: how did you learn to change the kits? Did you take a class or did it come naturally to you?
Thanks again,
Dell
You can't possibly be a pest! Scoring the side floor: I took an utility knife (hardware store purchase) and cut along the seams between the walls and floor, top and bottom. I hadn't thought about softening the glue with H20, but I have carefully used a heat gun on wood dollhouse furniture to separate parts. The balcony cut: actually scoring a line with a knife and a straight edge would probably help for the initial draws of the saw, and I used an Exacto saw that comes with an Exacto miter box. The cut stays nice and straight.
DeleteI have come up with all my changes myself, or with the added brain and muscle power of my hubby. Thank you for the glowing words! You can do it. Wood putty or little pieces of trim and glue can do wonders with mistakes! -Shanni
Thank you. The kit is for my July birthday and I'm not really supposed to start it until then. I love your ideas and can't wait to try some of them Dell
ReplyDelete