Yay!
The panels and trim from Manchester Woodworks http://manchesterdollhouseandwoodworks.com/, have arrived, and I've sanded, applied two different stain colors and polyed the whole lot!
 |
| 1st stain coat: Minwax Provincial. 2nd stain coat: Dark Walnut. I always start with the lightest stain first. |
___________________________
The Floors
I've decided try some staining experimentation on the wood floors since I'm planning to cover them anyway. I wanted a checkerboard on the diagonal pattern. Creating the checkerboard pattern is trickier than it looks!The first time I tried it I didn't score lines. It didn't work very well but it still had a nice, subtle effect. That experiment is now the 2nd floor floor (am I saying that right?).
Here is the technique that worked best for a lovely, stained, checkerboard floor:
 |
| Step 1 Scoring the lines. Step 2 Taping alternate lines of squares. |
Step 1: Scoring the lines (I used painter's tape to evenly space my lines. The width of the tape is the width of a square). You'll have to figure out your first diagonal so you'll have squares or elongated diamonds. Don't draw lines, let the width of tape be your guide and start with a tape spanning each end of your first and only diagonal markings.
- Lay out the tape on your first diagonal on your prestained board.
- Lay the metal straightedge just a smidgen past the tape edge. Hold down tightly!
- Using the back edge of a butter knife, press to score a line between the straightedge and the tape. (I have taped off a border). Score a couple of times to insure a good indentation.
- Lift the tape and place it up against the "fresh" score line. Continue scoring until all the "warp" scores are made.
- Perform the same scoring technique for the "weft" lines. They will be 180° to your previous lines.
- Every other line of squares, tape off between the scores. Do this for both the warp and weft of the lines of squares so that there is a crisscross of tape with little open squares in between.
- Stain this first set of squares with your second color. Blot the stain on, gently.
- Remove the tape.
- Tape over these stained lines of squares, both the warp and weft, betwen the lines' scores. Only our prestain background color should be seen (with a bit of bleed over of course!).
- Stain this second set of squares with your third color (or if you want the squares to be all the same color, the same stain as your first set). Blot gently.
- Remove the tape and voila! Let dry and polyurethane the whole board (you can use waterbased poly).
 |
| Step 2 con't. The first stained squares. Step 3 Finished! |
___________________________
Beginning To Assemble: The 1st and 2nd Floors
(finally!)
I've read all the instructions and have decided to assemble only the 1st and 2nd floors to the sides at this point. The instructions are pretty clever for this part, they have you use other parts of the home to support and get correct heights and such. I'm leaving the back off for now as I want good access to the interior sides when I apply the wainscot paneling.
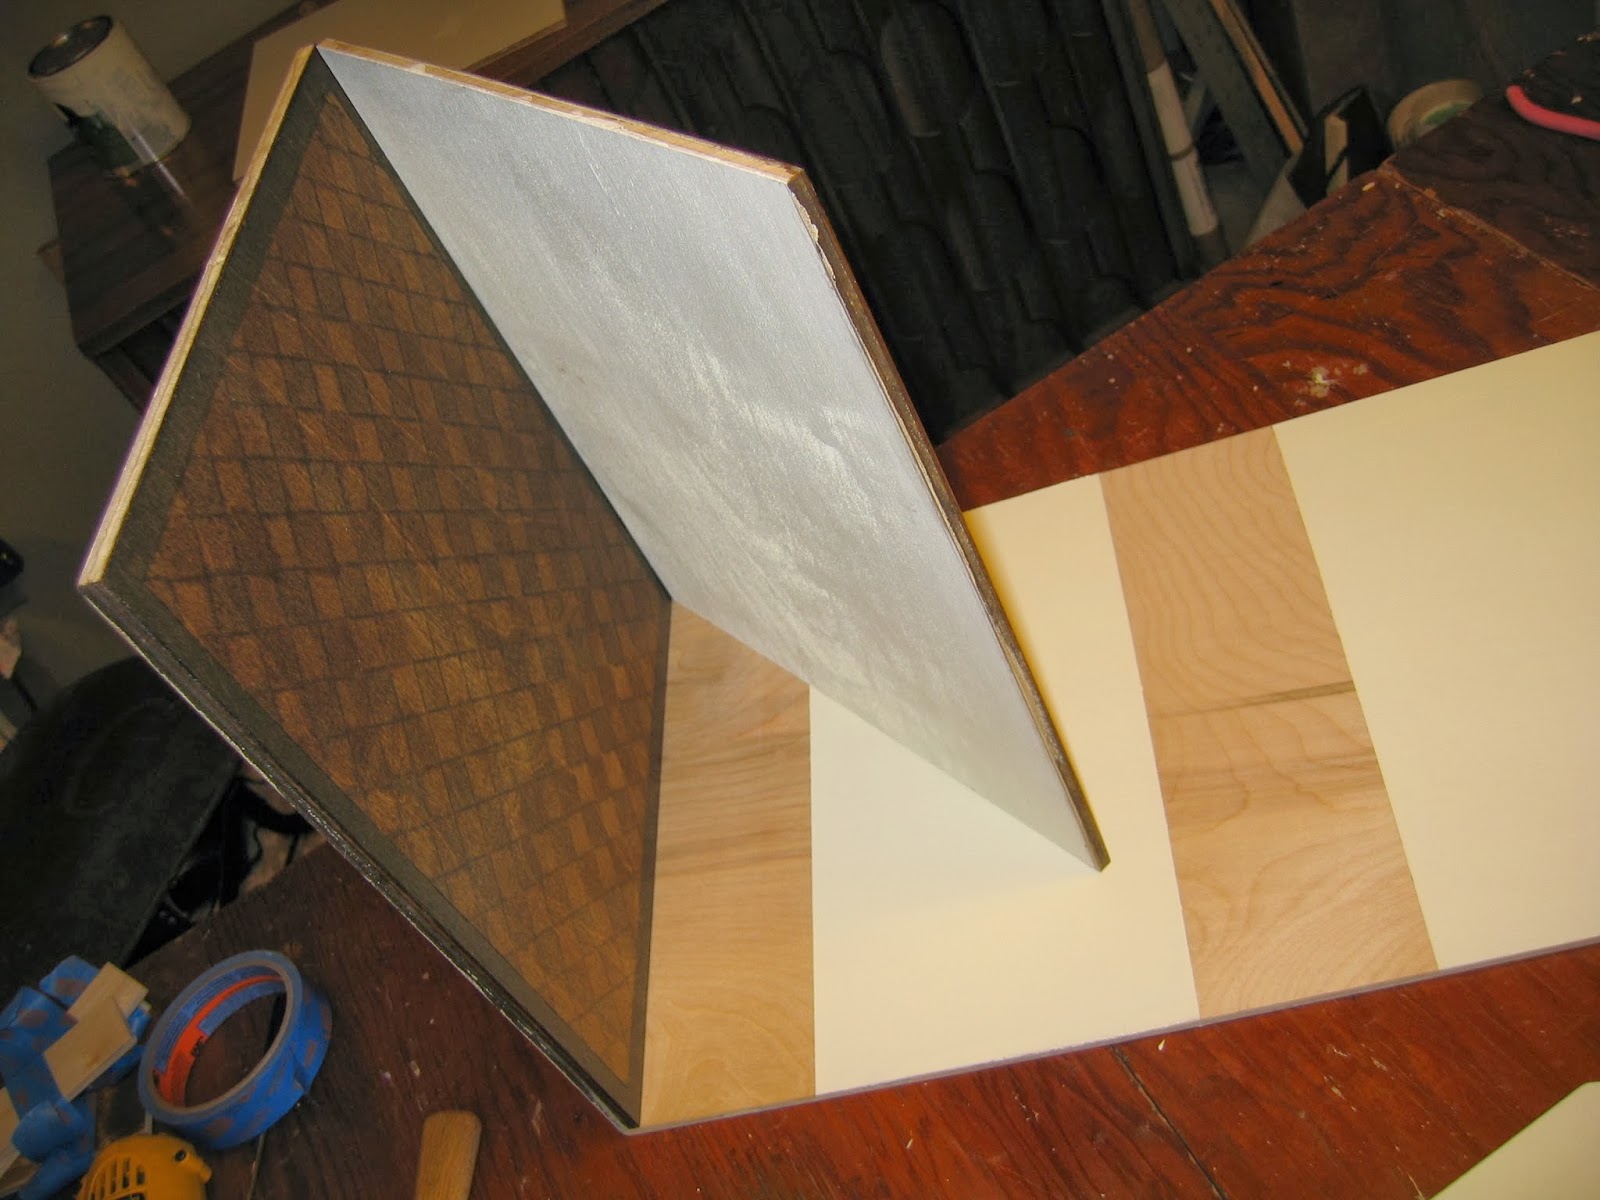
Here, one side of the house has been glued and nailed to the 1st floor and sits flat on the table. Another floor is propped up at an angle to support the opposite side's attachment to the 1st floor.

 |
| I don't think I'll be covering the floors. I really like them stained! |
___________________________
Puttzin' and Thinkin': Checking Scale and Ideas
 |
| Testing the placement of the components for the bay window. |
 |
| Testing the scale of the bay window components with the 3/4 scale furniture pieces. |
 | Well, I've made some good headway but soooo much more to go. But I'm very happy how the wee Tudor has come together so far. Hope to see you soon for the next part of this ongoing odyssey! | |
| Mock up and scale test of house 3/4 scale furniture and the possible stair placement. |
Haven't you been busy, Little Loosie! I'm VERY impressed with your stained floors, they've turned out great, glad you're not going to cover them up. Your bay window arrangement is great too, this is such an exciting project and I'm really loving seeing it happen - thank you!
ReplyDeleteThank you Keystone Crazy! It's so nice you always check back to see! 'm very obsessed right now, of course. My job just gets in the way. Oh well. Thanks for the words of encouragement! I need them!!! Back to the basement & best on your projects -S
ReplyDelete